Showing posts with label javascript. Show all posts

Tuesday, August 25, 2020

Deploying JavaScript Game to Steam, App Store, Google Play, and PWA

As time has allowed over the past few months, I've been experimenting with Paco and the Tumbling Seed Box to take advantage of various open source technologies like Cordova and Electron so that Paco can play on multiple platforms. Using Cordova, I can package the game as an app for both the App Store and the Google Play store. Using Electron, I was able to build standalone versions of Paco for Windows, Mac, and Linux.

One of the first issues I ran into is that both of these tools are unable to build for all platforms from the same development computer (with the exception of Cordova being capable of building both iOS and Android versions on a Mac). I wanted a solution that allowed me to build the game for all of these platforms without me having to bounce between computers. Even better, I preferred a solution that allowed me to invoke a command from the game code base itself to build for any or all platforms regardless of what platform I am presently using.

So I created a packager project that runs as a nodejs express server with built-in relays to handle requests depending on the platform it's serving from and pass along those it can't handle to another server. Running this service on a Mac and on a PC provides game-packaging services for all the current platforms I've built support for. From Paco's game development project, I can run something like "npm deploy:steam", which packages the current version of the game into a zip file and sends it to the PC. The PC in turn recognizes that it is unable to deploy to Steam (Windows seems to have issues with ".app" Mac files) and passes the game zip on to the Mac. The Mac recognizes that it can't package for Windows, so it leaves that to the PC and builds the Mac and Linux versions using Electron while the PC builds the Windows version and sends it to the Mac. Once the Mac has all three versions ready, it ships it off to Steam using tools from the Steam SDK.

In addition to the above, I also set up the packager to deploy a PWA version to the website. I'm still working on the hosting website as time allows, but you can enjoy the current progress and see the four targets at https://town.gopherwoodstudios.com/store/paco.html

Each platform and store has its own quirks, but I'm hoping that this process will separate those issues from the game itself and make deployment of future Gopherwood games a bit simpler, allowing each game to reach folks on the platforms they prefer as well as making game updates and fixes go a little quicker.

Friday, December 13, 2013

The Components of a Platypus: An HTML5 Engine Mid-Mortem

The Platypus engine is Gopherwood's first foray into the world of component-based design. The engine has a long life ahead of it, but as a sort of mid-mortem we thought we'd take a second to share our reasoning for going the component-based route and how we feel about the results so far.

Components. Kinda like Legos, but less painful to step on.
When we first got the go ahead to put together an HTML5 engine for PBS Kids the first thing we did was fish around for a proper design template for the engine. When a talented programmer friend recommended we look into a component-based design, we did exactly that. For those unfamiliar with the model, the idea is that game entities are made of a simple object whose functionality is fleshed out by adding a collection of objects called components. These components are designed to function independently so that they can be added/removed/replaced with impunity. After a little research into the design we were convinced by a few arguments we found.

Arguments for Components

The first argument for a component-based design was an argument against using the more popular class-based design model with JavaScript. JavaScript is not a class-based language and doesn't lend itself to a traditional class-based design model without some finagling (that's a technical term). We felt that a component-based design fit more cleanly in JavaScript's design tenants. By starting out with a design model that better matched JavaScript's nature we felt that we would benefit by doing less working against the grain.

Another benefit we saw for avoiding a class-based design was to get away from the bloatedness (another technical term) of inheritance. With engines that use inheritance, you often inherit from several standard classes when you are creating a new entity. In the process you often inherit more than you need for what you're doing. This is because each new entity has special cases that requires small revisions and additions to the standard inherited classes until eventually these classes are bloated with functionality that is useless in most situations. Component-based design is in some ways a form of hyper-multiple-inheritance, in that each piece of functionality (logic, ai, physics, etc.) is 'inherited' from a component. The difference is that each component is designed to work discretely, meaning that special cases (and the bloating they tend to cause) can be dealt with using a unique component while the rest of the components remain standard issue.

Finally, because all of an entity's functionality is found in its components, the argument stood that it would be easy to quickly assemble new entities from existing components and reuse components.

The Good Side

You mean we aren't unique?!
So did it live up to all the promises? For the most part, yes. We've been very happy with the ease of developing in the component-based model. In particular, creating new entities from existing components has made the development process considerably quicker. In some cases, such as the playable characters in Wild Kratts: Monkey Mayhem, we are able to create entire entities without a single line of unique Javascript. And in most cases, we are able to reuse existing components to add large pieces of functionality to an entity without adding more functionality than we need. Designing entities is made easier by using JSON to assemble the components that will make up an object and give initial settings for those components. All of these things add up to the ability to make lean entities efficiently.


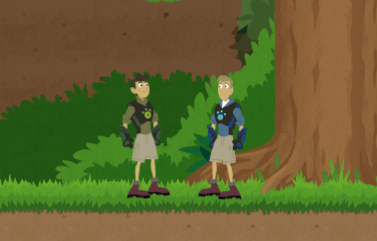
A good example of how easy it is to put together an entity from standard components is the ant entity in Monkey Mayhem. The ants in Monkey Mayhem behave like Goombas from the Mario series. To create their behavior we use four standard components: ai-pacer, logic-directional-movement, logic-gravity, and collision-basic. Collision-basic allows us to define what the ants will collide with. Logic-gravity will cause the ants to fall when they aren't supported by terrain or a solid entity. Logic-directional-movement tells the ant how to move each game tick (in the ants case it's defined to move horizontally at a steady pace). Finally ai-pacer works in conjunction with collision-basic and logic-directional-movement to tell the ant to reverse direction whenever it collides with a wall. While this is only one example, it's easy to imagine how by swapping out one of these components with a new one we can quickly create new types of enemies.

The Challenges

While many of the promises of a component-based design have come true, that's not to say there haven't been challenges.

There have been multiple systems that have strained against the restrictions of the component-based model, particularly the limitation that components should be discrete and ignorant of the inner-workings of one another. Our collision system is an example of a system that violates this principle. We found that some components needed to be more tightly coupled than was possible in a pure component model and so we opted to violate those principles instead of creating an unnecessarily complex workaround. Deciding when and where to do this in the engine has been a recurring question. As our experience with the engine grows we feel that the answers to when to break the rules will become clearer.

Pew! Pew! Pewpew!
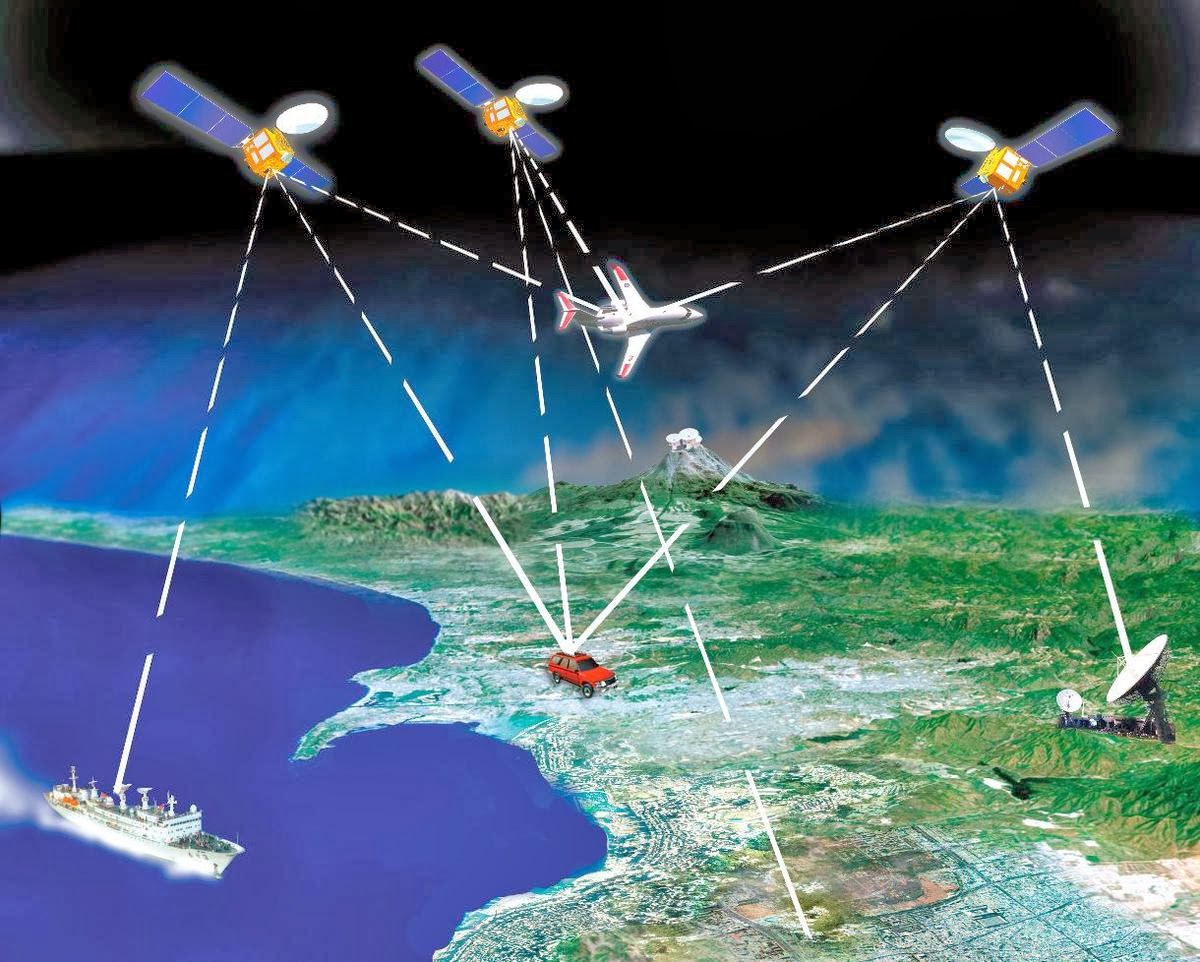
Another challenge was developing a means of communicating between components. It took some iteration before we found solutions that felt natural. For communication within an entity we used an event-based model. For those unfamiliar with this model it is somewhat similar to how a satellite relay works. A component that wants to send a message to another component broadcasts the message to its owner entity (the satellite). Which then rebroadcasts the messages to any listening components. This worked well for communication within an entity, but didn't scale to communicating between entities because there was no simple way to specify which entities would receive the message. Instead, we came up with a couple solutions that were useful for different situations. The first, and most direct, was to let a component listen for when other entities were added to the current scene. If an entity is of interest, the component can retain a reference and then communicate to that specific entity. A second solution was to set up a modified event-based system using our 'entity-linker' component. With this system an entity can link to a particular 'channel'. The entity will receive any messages broadcast on that channel. Similarly the entity can broadcast its own messages on the channel for other entities to receive. 

In addition to these challenges, there is also a general mental shift needed to switch from traditional inheritance oriented design to a component-based model. Thinking about each component as discrete, determining the proper means of interfacing with other components, deciding when to generalize a component or keep it specific, etc. All of these are questions that occur repeatedly as we work on Platypus. These aren't bad questions, just different.

We Like It, Now You Try It

In summing up, we are really happy with how Platypus has come together and continue to believe that going the component-based route was the right choice for the engine. If you want to form an opinion for yourself, feel free to check out the engine here on GitHub.

Monday, November 25, 2013

47 Easy Steps to Publishing Your First Platypus HTML5 Game

There are not exactly 47 steps to completing your first game, but this is the beginning of an article I'm planning to write stream-of-consciousness style, and I'm not looking back.


Step #1 - Get Platypus!

The PBS Kids team has provided the Platypus repository here: https://github.com/PBS-KIDS/Platypus

Once you have Platypus in hand, visit /game/template.html in your browser. You should see an initial example game appear. You're done! One step! Unless, of course, the one-level example game with +Todd Lewis's incredible pixel art wasn't what you were going for... ...then continue to Step #2. Coming up next. Scroll down.
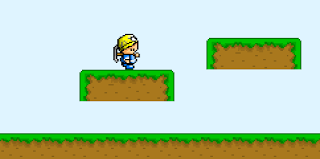
The tranquil, serene landscape of an example game.


Step #2 - Configure the Game!

There's nothing that says a picture isn't worth a
1000 words like a picture of fewer than 1000 words
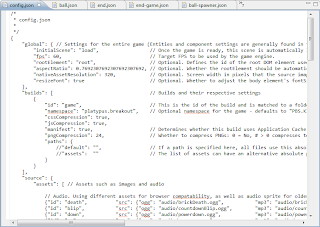
Configure? Go figure. This is where you begin chewing into the code, but take small bites so we don't have to get all Heimlich on you. Check out the /game/config.json file. Go ahead, open it up. Note that we'll be doing a lot inside of the /game/ folder, because that's where the game is. The file you just opened is where most of the configuration for the game is stored (unless you just opened up a file not called "config.json"). It's a JSON-structured file with lots of settings. For this blog post, I'm going to walk through some of the changes I made to implement Breakout.

Global Settings

The first section determines some blanket settings for the whole game. You can change things like what scene the game should start on, the DOM element that should contain the game, and the framerate the game should target. While you do that, I'll change the game's aspect ratio to better fit Breakout: a nice, simple 0.7692307692307692307692.

Build Settings

This next section is an array containing settings for each build you want to create. Platypus lets you create, debug, and test the game at /game/template.html as you're working on it, but once you're ready to deploy, these settings mix up the batter, bake the game, and gently place the still-warm game files into the builds folder.

For Breakout, I'm getting rid of the "debug" build in the example so I'm down to a single build generically named "game". Nothing else really needs to be changed here, unless you don't want to use AppCache, hate compression, or want to use a custom namespace. I'm going with "platypus.breakout", but you can go crazy with the namespacing if you like: "namespace.name.space.my.awesome.game.space" We'll come back to build settings later, when we build our game at step #46 (give or take).

Game Sources

This is where the fun starts! This section is what comprises the entirety of your actual game, so let's stop all this chatterboxing about config.json and jump to the next step!


Step #3 - Create Awesome Art and Sounds!

Oi. This is where I call in professionals... ...or copy-and-paste if allowed. In either case, or if you're adept in the arts and create your own, take those awesome graphics and audio clips and drop them into /game/images/ and /game/audio/. Fortunately for Breakout, I am able to copy the art and sounds and be on my merry way.

Once they're all sitting comfortably in their new homes, you need to give them addresses so we can reach them later. Do this in config.json, in the "sources" section we jumped away from at the end of Step #2. You can copy the syntax of the example game images if you like, or just erase them all and pay attention. Images are easily specified with:

{
    "id": "image-id-that-is-used-in-the-game-code",
    "src": "images/image-name-that-is-addressed-by-id.png"
}

Audio is more complicated. You can go the easy route and use the syntax above to just target a subset of browsers, or you can brave the rough waters of HTML5 Audio support and read this more in-depth explanation. Have fun!


Step #4 - Make a Map!

Now that you have visuals, it's a great time to make a map! If you don't already have the Tiled Map Editor on your computer, go get it! It's awesome!
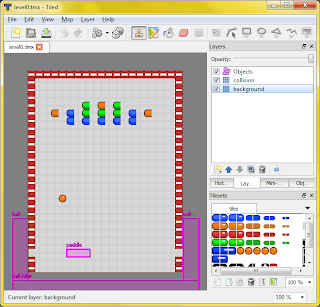
Tiled being awesome doing what Tiled does best: Tiling.
Got it yet? Alright, then onward! There's a whole tutorial here for all the captivating details. Once your map is ready, export it in JSON format and drop it in the /game/levels/ folder. Just like the other assets, give it an address in config.json in the "levels" section.

Things I included in Breakout are a tile and collision layer for the walls, a tile layer for the background tiles, and an object layer containing most of the entities I'll need in the game such as:
  • "brick-blue" - A blue brick.
  • "brick-red" - A red brick.
  • "brick-orange" - An orange brick.
  • "brick-green" - A green brick. Yes. I know. I could've made a single "brick" entity, but they were expecting that.
  • "ball-spawner" - This entity will create new balls.
  • "paddle" - The star of my little Breakout game - this fella never gets a break.
  • "ball-killer" - An unseen entity hovering below the stage, awaiting to consume any unfortunate balls that fall thither.
These are just text identifiers in the map at this point, but that's soon to change!


Step #5 - Fashion Entities!

An invisible, senseless robot
Entities do all the work in a Platypus game. They're tough like that. They're like little robots with a big heart and no limbs... ...or brain... ...or even a body for that matter. They're like little invisible, senseless robots, but you get to change that! You get to give them limbs, brains, and cold metallic skin so they can change the (game) world with their big hearts!! Read on to find out how!

Platypus entities are a really, really simple JavaScript objects. What makes them come to life are components. One or more logic components are attached to the entity to give it logic that determines its behavior; one or more render components are attached to give it an appearance in the game world; and one or more collision components are attached to make it interact with other entities. There are a lot of Platypus components.
A visible, sensible... ...robot

Now that you know, take that little invisible robot with a big heart and give it some components! For the Breakout "ball-spawner", I gave it two components: "logic-spawner" (logically, to spawn stuff) and "entity-linker" (like a radio channel to communicate with other entities). Its code looks something like this:

{
    "id": "ball-spawner",
    "components":[
    {
        "type": "logic-spawner",
        "spawneeClass": "ball",
        "speed": 0.16
    },{
        "type": "entity-linker",
        "linkId": "paddle"
    }],
    "properties": {}
}

"Wait! Hold up! Where's this happening!?!" you ask. Oh, right. Check out /game/entities/ and you'll see a bunch of entities created for the example game. I can add mine here as "ball-spawner.json" (and delete a few of the example entities I have no need for). Once that's done, I'll go to config.json and add its address under the list of entities.

What if the list of components isn't long enough? What if the special ability of your superhero isn't covered by a prefab component?? What if my Breakout paddle should do more than the combined abilities of the 11 components already attached to it??? (It doesn't help that my paddle has also become something of a game manager at this point, but that's neither here nor there; moving on...)


Step #6 - Create Customized Components!

Ah, amazing alliteration. Anywho, if your entity needs a bit of non-prefab-life added to it, either to tie-up a few loose ends or to entirely define the entity's very existence, make a copy of /game/components/ec-template.js, and begin molding that component into your very own creation. Once you're finished (or probably not - that whole debugging thing always seems to crop up and turn "done" into "5% complete"), add it to the list of available components in config.json and give it an id, then turn around and update the entity with the newly-created component!

The indefatigable "paddle" entity
For Breakout, I created one custom component on the "paddle" entity called "logic-paddle". It handles special things like sending impacting balls off at the correct angle, reacting to power-ups, and handling input from the player.


Step #7 - Build the Game!

Well, that was fast! We're done... ...helped by the fact that I entirely brushed over the intricacies (which I do hope to get deeper into at some point) and left out several iterations of testing and debugging (which would make for some pretty dry copy). Now that we're finished testing everything on /game/template.html, we hop on over to /tools/ (Yay! New folder!) and hit compile.bat or compile.sh depending on your OSrientation.

You'll see a series of compilation logs scroll by. If you notice any ugly errors, it's probably incorrectly formatted JSON. A missing comma typically looks not like a missing comma:

compile-json.js(96, 4) Microsoft JScript compilation error: Expected '}'

If all goes well, you'll see a new folder called /game/ in your /builds/ folder. Visit /builds/game/ in your favorite web browser and be amazed at your beautifully-crafted HTML5 game!


Step #8 - Play!
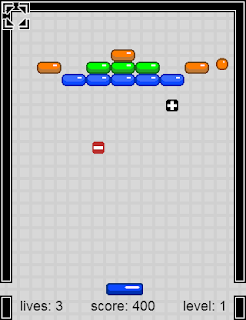
Breaking Out
Unless you don't play games. Then don't. Maybe you can find a friend or two to play it. Unless you don't share either. Can't help you there.

Who knew? I should've said "8 Steps". There you have it. 39 fewer steps than anticipated. This has been a rather high-level overview, so be sure to check out the reference and guides in the Platypus github wiki for more in-depth information.

If you decide to give Platypus a whirl, we'd love to hear what you're making! We're also hoping to make the learning curve as easy as possible, so if you run into any hurdles where things just do not work as you would expect, let us know that too! (Or, if you're in the mood, knock down the hurdle, grind it into a bunch of broken bits, pave over it with a bucket-full of awesome, and submit a github pull request.)

Which HTML5 Game Engine Should I Use?

What's the perfect HTML5 game engine for your next game? We have our biased opinion, but we'll set that aside for the moment to talk about Breakouts. Breakouts is a really cool initiative started by Matt Greer to create a single game using multiple engines. Matt (along with several other contributing developers) has created Breakout using several different HTML5 engines. As of this post, Crafty, CreateJS, FriGame, Frozen, ImpactJS, LimeJS, MelonJS, Platypus, and Quintus all have working implementations of Breakout on the site. Oh, is Platypus bold? Whoops, I'll fix that later.

If you want to check out the code involved, the development style, and features across several HTML5 engines, Breakouts is a fantastic starting point. Also, be sure to check out the convenient feature comparison table.

Friday, April 29, 2011

Making HTML5 Games Match Your Screen

Sand Trap was our first opportunity to try supporting multiple resolutions, when we chose to enter it into SPIL Games' HTML5 Contest, geared towards mobile devices. At the time I decided to make it fluidly adjust to match any resolution it was opened on. This way it could not only match any width and height combination of a mobile device but also any resolution of a conventional computer browser. It worked well for Sand Trap, so we're re-using some of the same tricks on Thwack!!

Thwack!! on a maximized 1024x768 browser window
Implementing this requires taking advantage of CSS and JavaScript. Using just CSS, filling the whole screen is trivial, but CSS didn't allow us to maintain the same width-to-height ratio to prevent stretching of the gameboard, so that's where the JavaScript comes in.

Since we're not completely concerned about the exact width or height, the first piece of information we need to set is the ratio of width to height. In Thwack!!, we have it set to 4/3 (the game area is 4 units wide to 3 units high). Once we have determined this, it's a matter of making adjustments whenever the document is resized or, in the case of mobile devices, the screen orientation is changed. We handle these events by setting:
 window.addEventListener('resize', resizeGame, false);
 window.addEventListener('orientationchange', resizeGame, false);
Now we create a "resizeGame" function to handle these two events. With Thwack!! it's a bit more complicated since we're using multiple canvases, but if the game is running on a single canvas, it might look something like this:
 function resizeGame()
 {
  var gameBoard        = document.getElementById('canvas');
  var widthToHeight    = 4 / 3;

  var newWidth         = window.innerWidth;
  var newHeight        = window.innerHeight;
  var newWidthToHeight = newWidth / newHeight;

  if (newWidthToHeight > widthToHeight)
  {  // window width is too wide relative to desired game width
      gameBoard.style.height = newHeight + 'px';
      newWidth               = newHeight * widthToHeight;
      gameBoard.style.width  = newWidth + 'px';
  } else {  // window height is too high relative to desired game height
      gameBoard.style.width  = newWidth + 'px';
      newHeight              = newWidth / widthToHeight;
      gameBoard.style.height = newHeight + 'px';
  }

  // center the canvas
  gameBoard.style.marginTop  = (-newHeight / 2) + 'px';
  gameBoard.style.marginLeft = (-newWidth / 2) + 'px';
 };
Thwack!! on mobile Safari
Basically, if the window is too tall, we make width 100% of the window; if the window is too wide, we make height 100% of the window. The remaining dimension is sized according to the width-to-height ratio we previously set.

The last part re-centers our canvas in the middle of the screen. Many of the CSS properties we are concerned with are manipulated directly by the function above, but in order for those to work, we set up a few other CSS properties as follows:
 #canvas
 {
  position: absolute;
  left:     50%;
  top:      50%;
 }
This allows us to put the top left corner of the canvas in the center of the screen, and then our resizeGame() function gives the canvas a negative top and left margin half of the width and height of the game board so it is centered in the window.