There are not exactly 47 steps to completing your first game, but this is the beginning of an article I'm planning to write stream-of-consciousness style, and I'm not looking back.
Step #1 - Get Platypus!
Once you have Platypus in hand, visit /game/template.html in your browser. You should see an initial example game appear. You're done! One step! Unless, of course, the one-level example game with
+Todd Lewis's incredible pixel art
wasn't what you were going for... ...then continue to Step #2. Coming up next. Scroll down.
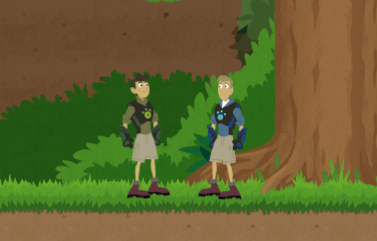
 |
| The tranquil, serene landscape of an example game. |
Step #2 - Configure the Game!
 |
There's nothing that says a picture isn't worth a
1000 words like a picture of fewer than 1000 words |
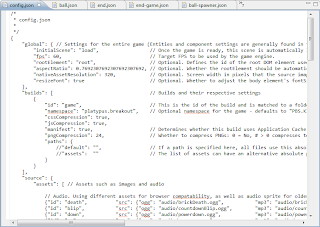
Configure? Go figure. This is where you begin chewing into the code, but take small bites so we don't have to get all Heimlich on you. Check out the /game/config.json file. Go ahead, open it up. Note that we'll be doing a lot inside of the /game/ folder, because that's where the game is. The file you just opened is where most of the configuration for the game is stored (unless you just opened up a file not called "config.json"). It's a JSON-structured file with lots of settings. For this blog post, I'm going to walk through some of the changes I made
to implement Breakout.
Global Settings
The first section determines some blanket settings for the whole game. You can change things like what scene the game should start on, the DOM element that should contain the game, and the framerate the game should target. While you do that, I'll change the game's aspect ratio to better fit Breakout: a nice, simple 0.7692307692307692307692.
Build Settings
This next section is an array containing settings for each build you want to create. Platypus lets you create, debug, and test the game at /game/template.html as you're working on it, but once you're ready to deploy, these settings mix up the batter, bake the game, and gently place the still-warm game files into the builds folder.
For Breakout, I'm getting rid of the "debug" build in the example so I'm down to a single build generically named "game". Nothing else really needs to be changed here, unless you don't want to use AppCache, hate compression, or want to use a custom namespace. I'm going with "platypus.breakout", but you can go crazy with the namespacing if you like: "namespace.name.space.my.awesome.game.space" We'll come back to build settings later, when we build our game at step #46 (give or take).
Game Sources
This is where the fun starts! This section is what comprises the entirety of your actual game, so let's stop all this chatterboxing about config.json and jump to the next step!
Step #3 - Create Awesome Art and Sounds!
Oi. This is where I call in professionals... ...or copy-and-paste if allowed. In either case, or if you're adept in the arts and create your own, take those awesome graphics and audio clips and drop them into /game/images/ and /game/audio/. Fortunately for Breakout, I am able to copy the art and sounds and be on my merry way.
Once they're all sitting comfortably in their new homes, you need to give them addresses so we can reach them later. Do this in config.json, in the "sources" section we jumped away from at the end of Step #2. You can copy the syntax of the example game images if you like, or just erase them all and pay attention. Images are easily specified with:
{
"id": "image-id-that-is-used-in-the-game-code",
"src": "images/image-name-that-is-addressed-by-id.png"
}
Audio is more complicated. You can go the easy route and use the syntax above to just target a subset of browsers, or you can brave the rough waters of HTML5 Audio support and
read this more in-depth explanation. Have fun!
Step #4 - Make a Map!
Now that you have visuals, it's a great time to make a map! If you don't already have the
Tiled Map Editor on your computer, go get it! It's awesome!
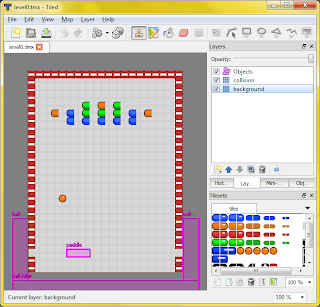 |
| Tiled being awesome doing what Tiled does best: Tiling. |
Got it yet? Alright, then onward!
There's a whole tutorial here for all the captivating details. Once your map is ready, export it in JSON format and drop it in the /game/levels/ folder. Just like the other assets, give it an address in config.json in the "levels" section.
Things I included in Breakout are a tile and collision layer for the walls, a tile layer for the background tiles, and an object layer containing most of the entities I'll need in the game such as:
- "brick-blue" - A blue brick.
- "brick-red" - A red brick.
- "brick-orange" - An orange brick.
- "brick-green" - A green brick. Yes. I know. I could've made a single "brick" entity, but they were expecting that.
- "ball-spawner" - This entity will create new balls.
- "paddle" - The star of my little Breakout game - this fella never gets a break.
- "ball-killer" - An unseen entity hovering below the stage, awaiting to consume any unfortunate balls that fall thither.
These are just text identifiers in the map at this point, but that's soon to change!
Step #5 - Fashion Entities!
 |
| An invisible, senseless robot |
Entities do all the work in a Platypus game. They're tough like that. They're like little robots with a big heart and no limbs... ...or brain... ...or even a body for that matter. They're like little invisible, senseless robots, but you get to change that! You get to give them limbs, brains, and cold metallic skin so they can change the (game) world with their big hearts!! Read on to find out how!
Platypus entities are a really, really simple JavaScript objects. What makes them come to life are components. One or more logic components are attached to the entity to give it logic that determines its behavior; one or more render components are attached to give it an appearance in the game world; and one or more collision components are attached to make it interact with other entities. There are
a lot of Platypus components.
 |
| A visible, sensible... ...robot |
Now that you know, take that little invisible robot with a big heart and give it some components! For the Breakout "ball-spawner", I gave it two components: "logic-spawner" (logically, to spawn stuff) and "entity-linker" (like a radio channel to communicate with other entities). Its code looks something like this:
{
    "id": "ball-spawner",
    "components":[
    {
        "type": "logic-spawner",
        "spawneeClass": "ball",
        "speed": 0.16
    },{
        "type": "entity-linker",
        "linkId": "paddle"
    }],
    "properties": {}
}
"Wait! Hold up! Where's this happening!?!" you ask. Oh, right. Check out /game/entities/ and you'll see a bunch of entities created for the example game. I can add mine here as "ball-spawner.json" (and delete a few of the example entities I have no need for). Once that's done, I'll go to config.json and add its address under the list of entities.
What if the list of components isn't long enough? What if the special ability of your superhero isn't covered by a prefab component?? What if my Breakout paddle should do more than the combined abilities of the 11 components already attached to it??? (It doesn't help that my paddle has also become something of a game manager at this point, but that's neither here nor there; moving on...)
Step #6 - Create Customized Components!
Ah, amazing alliteration. Anywho, if your entity needs a bit of non-prefab-life added to it, either to tie-up a few loose ends or to entirely define the entity's very existence, make a copy of /game/components/ec-template.js, and begin molding that component into your very own creation. Once you're finished (or probably not - that whole debugging thing always seems to crop up and turn "done" into "5% complete"), add it to the list of available components in config.json and give it an id, then turn around and update the entity with the newly-created component!
 |
| The indefatigable "paddle" entity |
For Breakout, I created one custom component on the "paddle" entity called "logic-paddle". It handles special things like sending impacting balls off at the correct angle, reacting to power-ups, and handling input from the player.
Step #7 - Build the Game!
Well, that was fast! We're done... ...helped by the fact that I entirely brushed over the intricacies (which I do hope to get deeper into at some point) and left out several iterations of testing and debugging (which would make for some pretty dry copy). Now that we're finished testing everything on /game/template.html, we hop on over to /tools/ (Yay! New folder!) and hit compile.bat or compile.sh depending on your OSrientation.
You'll see a series of compilation logs scroll by. If you notice any ugly errors, it's probably incorrectly formatted JSON. A missing comma typically looks not like a missing comma:
compile-json.js(96, 4) Microsoft JScript compilation error: Expected '}'
If all goes well, you'll see a new folder called /game/ in your /builds/ folder. Visit /builds/game/ in your favorite web browser and be amazed at your beautifully-crafted HTML5 game!
Step #8 - Play!
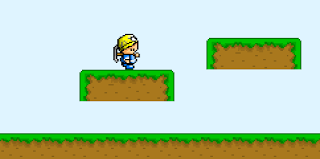
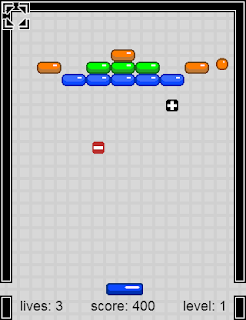 |
| Breaking Out |
Unless you don't play games. Then don't. Maybe you can find a friend or two to play it. Unless you don't share either. Can't help you there.
Who knew? I should've said "8 Steps". There you have it. 39 fewer steps than anticipated. This has been a rather high-level overview, so be sure to check out
the reference and guides in the Platypus github wiki for more in-depth information.
If you decide to give Platypus a whirl, we'd love to hear what you're making! We're also hoping to make the learning curve as easy as possible, so if you run into any hurdles where things just do not work as you would expect, let us know that too! (Or, if you're in the mood, knock down the hurdle, grind it into a bunch of broken bits, pave over it with a bucket-full of awesome, and submit a github pull request.)